Gluten Free Key Lime Pie (Dairy Free)
Recipe Key
Here is a healthy key lime pie that tastes even better than the classic one. It has an ultra creamy, tangy, sweet custard made with coconut milk and pastured eggs. The honey sweetened gluten free graham cracker crust is tender and buttery. You’ll love this gorgeous dessert especially in spring and summer.
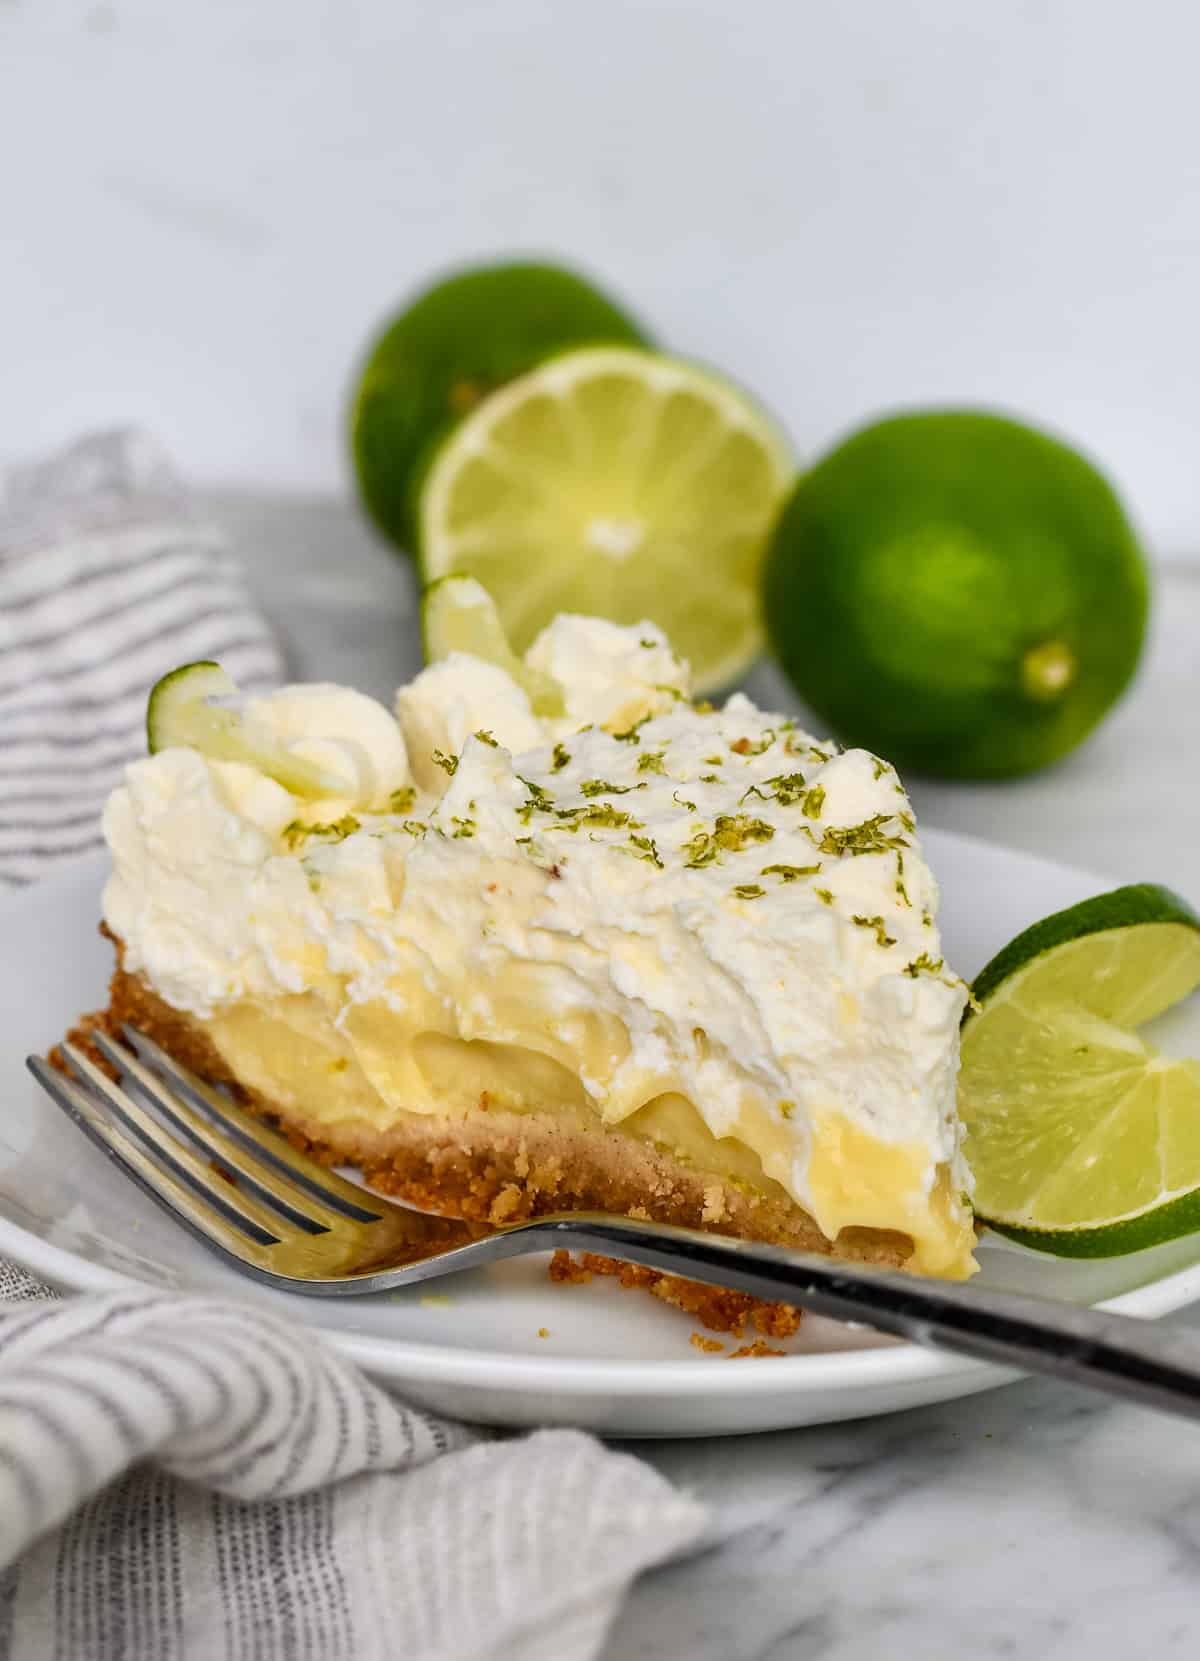
I am so excited about this recipe because it taste amazing. This elegant dessert is light and creamy with the perfect balance of sweet and tart. The best part is it’s healthy, made with simple whole food ingredients. Traditional key lime pie is not particularly healthy, it has lots of sugar and cream. I’ve made a few ingredient substitutions to make a healthy version! I think it’s even more delicious.
What makes this a HEALTHY Key Lime Pie?
- Good protein from pastured eggs: Eggs are a good source of easy to digest protein. They have lots of choline which improves brain function and memory. Pastured eggs have more omega -3 fats, vitamin D, E and beta-carotene. Buy locally if possible.
- Healthy fat from coconut cream: Instead of cream I use coconut milk. It contains a type of fat called medium-chain triglycerides (MCTs) that stimulate energy through a process called thermogenesis. The fat helps prevent blood sugar spikes.
- Gluten free: The homemade graham cracker crust is made with almond flour, coconut flour, tapioca and sweetened with coconut sugar and honey.
- No refined sweeteners: Most key lime pies are made with condensed milk which always has sugar in it. Even the dairy free ones. In this pie we use maple syrup for the filling, coconut sugar and honey for the graham cracker crust.
- Dairy free: The pie is totally dairy free, made with coconut cream in the filling instead of condensed milk. The topping is coconut whipped cream.
The pie can be served without whipped cream or just a few decorative swirls, it balances out the tartness of the filling. I love lots of coconut whipped cream, it tastes amazing. Whipped cream is so good!
Ingredients
This key lime pie is made with simple ingredients you can find in your supermarket or health food store. Technically speaking this is not a key lime pie because I use the traditional Persian limes you find in the supermarket. They work just as well.
For the Gluten Free Graham Cracker Crust
- Almond flour, Coconut flour and Tapioca flour – This combination creates the best texture for the crust.
- Coconut Sugar – Gives the crust a good texture and sweetness. Don’t substitute a liquid sweetener.
- Organic Palm Shortening -This is a fabulous non-dairy replacement for butter. It gives the crust a buttery flavor. Read Why I Like Organic Palm Shortening. Ghee or coconut oil can be substituted.
- Cinnamon and Honey – To give the crust a honey graham cracker taste.
- Sea Salt – To balance the flavors and enhance the sweetness.
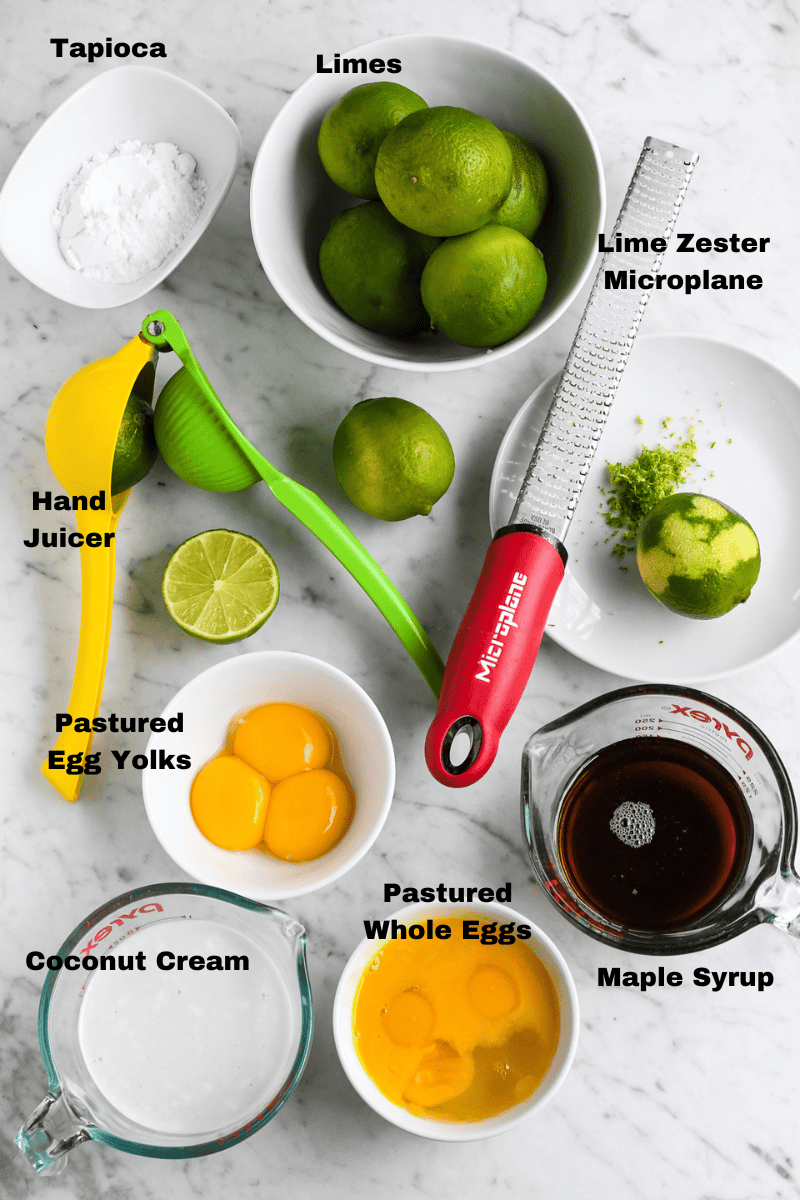
For the Filling
- Pastured Eggs – Here we use 3 whole pastured eggs and 3 egg yolks. You can use the leftover egg whites to make Coconut Macaroons.
- Freshly Squeezed Lime Juice – I use traditional organic limes because they are readily available. Key limes are great if you can find them. They’re smaller, a little more tart and aromatic but you can’t taste the difference in the Key Lime Pie. Use a hand juicer to juice the limes.
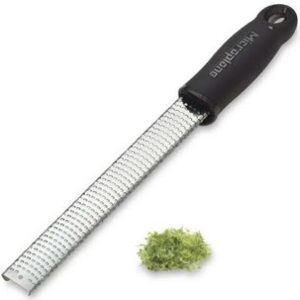
- Lime Zest – It’s best to use organic limes for zesting. Be sure to zest the limes before juicing them. Use a microplane to zest the limes.
- Tapioca Flour – Just a little to thicken the custard filling.
- Maple Syrup – A delicious natural sweetener that goes well with the limes. Use any liquid sweetener you like, but a sweetener like honey will change the taste.
- Organic Coconut Cream – For the filling shake up the can before measuring, you’re using the cream and liquid. If the coconut cream is separated, put it into a pot of hot water to soften and then shake it up. If you can’t find coconut cream, use the hardened cream on top of a can of coconut milk.
For the Coconut Whipped Cream
- Organic Coconut Cream – Here you have to chill the cans of coconut cream for 1-2 days. We’re only using the hardened coconut cream on top. Do not shake it up for the whipped cream. Save the coconut water to use in a smoothie. Full fat coconut milk can also be used.
- Maple Syrup – Just a a little to sweeten. Use any sweetener you like.
- Vanilla – Adds flavor and brings out the sweetness. Makes it taste less coconutty.

How To Make
There are a few steps to making this key lime pie. It’s easy but you need time for chilling. The pie needs to be refrigerated for at least 3 hours before topping it with the coconut whipped cream, so plan ahead. I usually make the pie the day before and put the whipped cream on when ready to serve. For the coconut whipped cream, the can of coconut cream needs to chill for 1-2 days in the refrigerator.
Here are the general directions, the exact steps are in the recipe card.
Prepare the Crust – Mix the flours and coconut sugar together in a bowl. Pour in the melted palm shortening and honey. Mix to combine.
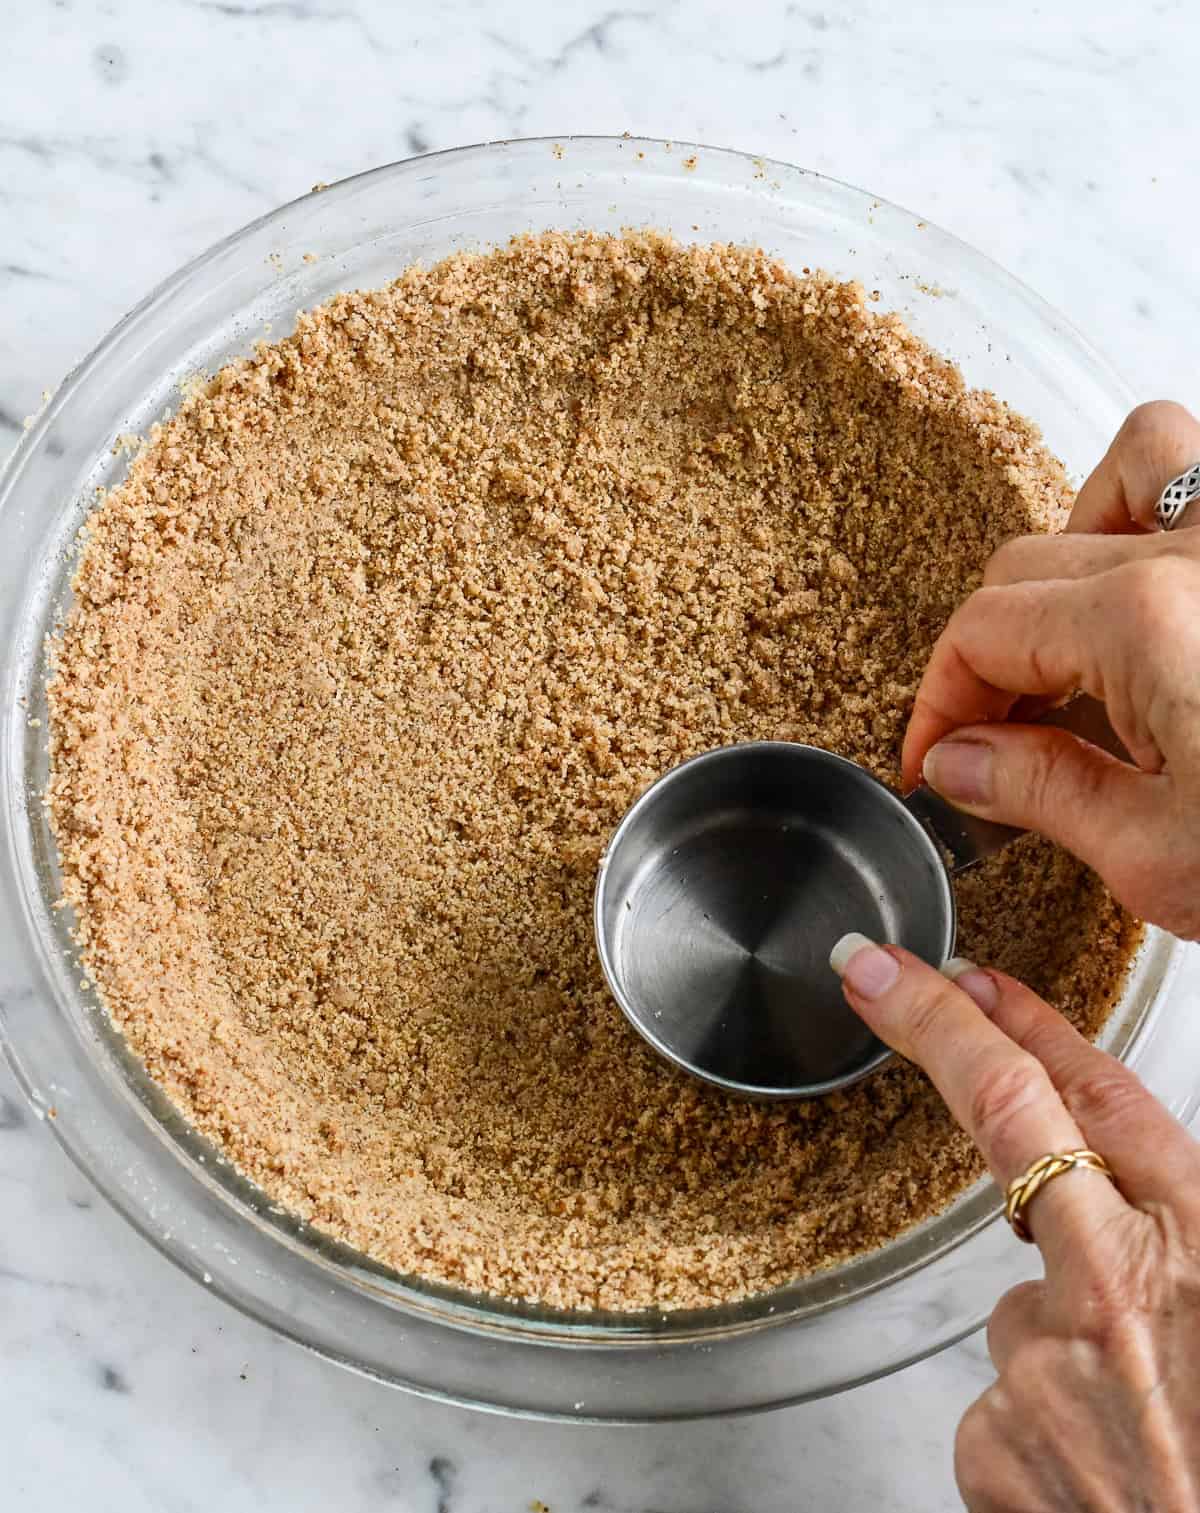
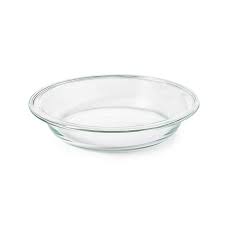
Press the Mixture Into A Pie Plate – Brush a 9″ deep dish pie plate with liquid oil ( I use avocado oil) to prevent sticking. Using your fingers and the bottom of a measuring cup, press the crust mixture evenly into the prepared pie plate. Start by working the crumbs up the sides, then press the remaining crumbs into the bottom of the pan. Don’t pack it down too hard to ensure the crust releases from the pan.
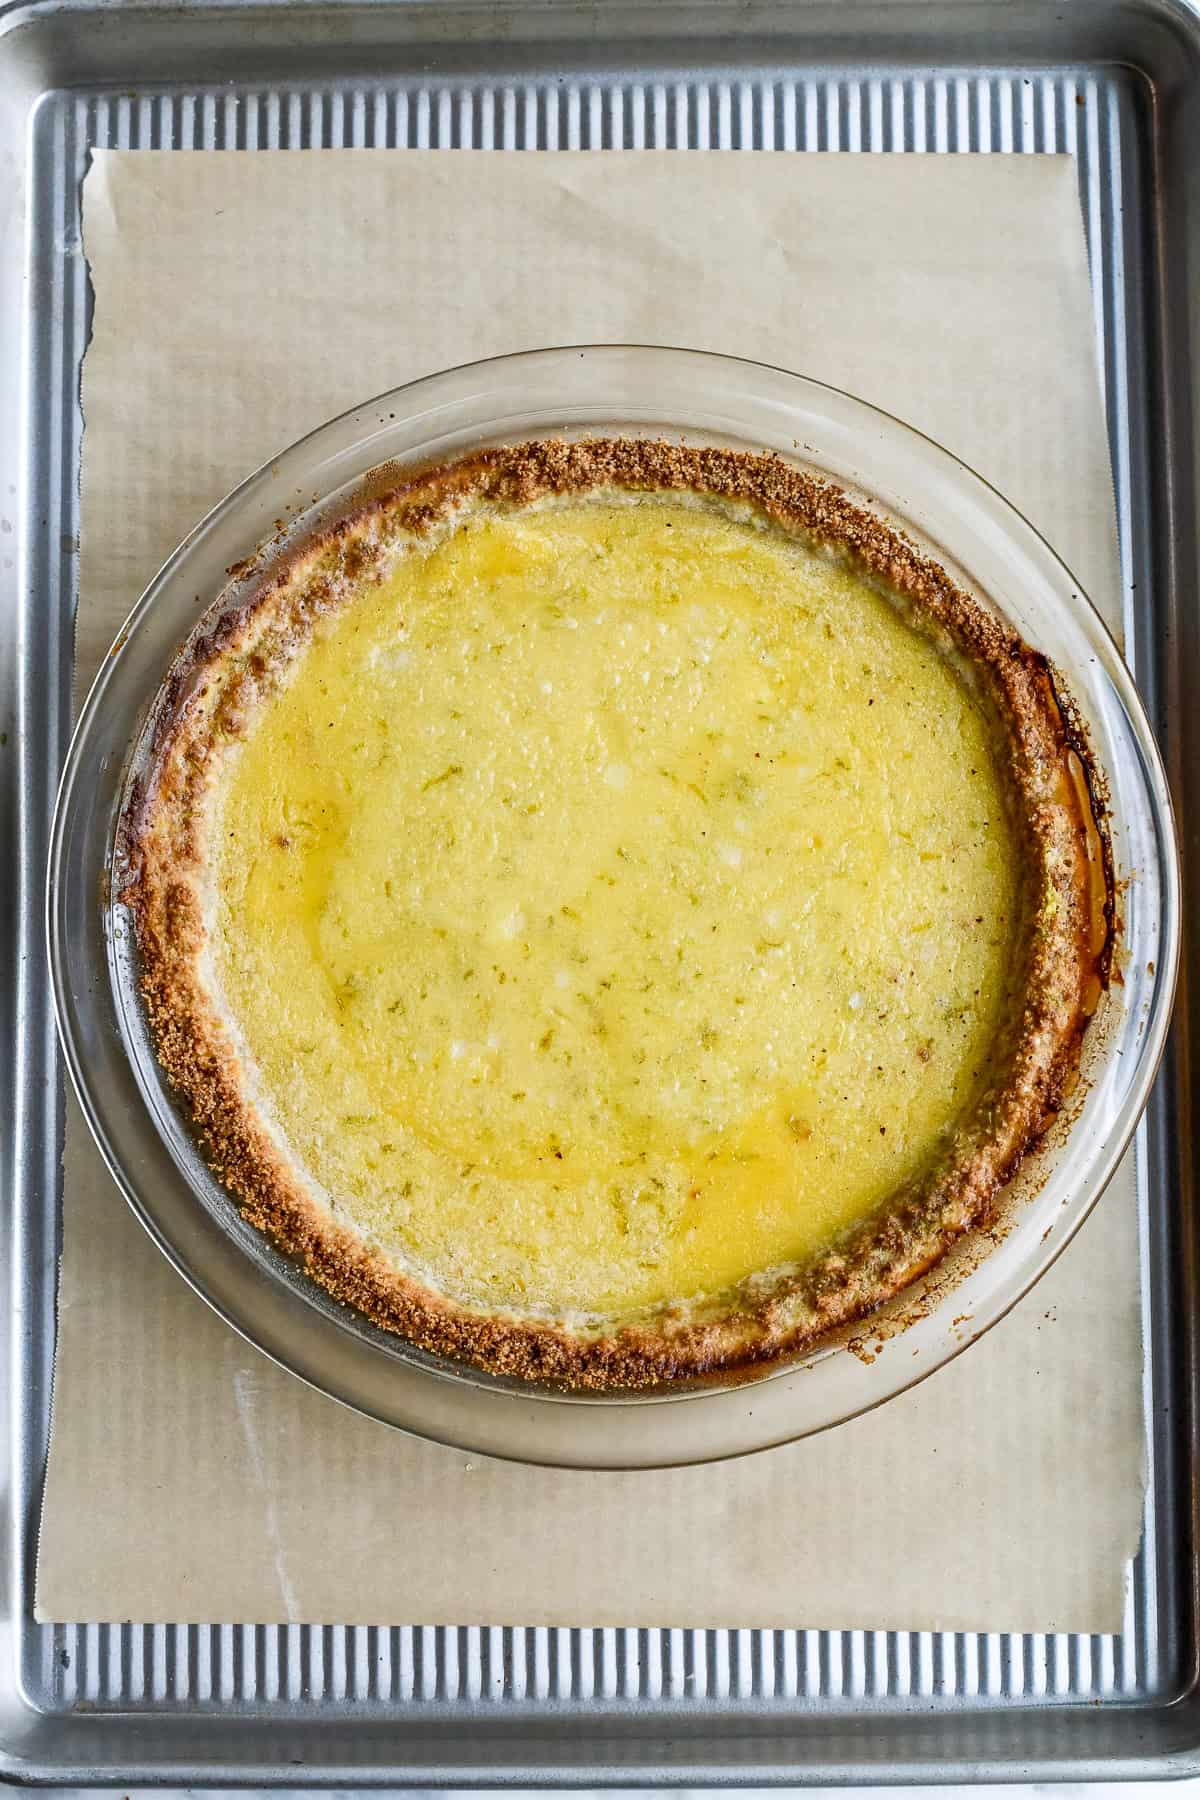
Bake – Put into a 350° oven, bake for 10 minutes then let cool while you prepare the flling.

Prepare the Filling – Zest the limes and squeeze the lime juice. Mix the tapioca with the lime juice to dissolve. Beat the egg yolks and eggs with the maple syrup until evenly combined, about 1 minute. Add the coconut cream, lime juice/tapioca, and zest. Mix until very smooth. Put your crust onto a baking tray to make it easy to get out of the oven, and pour in the filling.
Bake – Bake for 15 minutes. Cover with aluminum foil and bake for another 30-40 minutes until just set. The center will still jiggle a bit.
Cool and Chill – Cool to room temperature. Chill for at least 3 hours before topping with the coconut whipped cream.
Make the Coconut Whipped Cream – Have your coconut cream or coconut milk chilled for 1-2 days. Chill your mixing bowl for 15 minutes in the fridge. Open your can and scoop out the hardened coconut cream. Pour the coconut water into a separate storage container and use that in a future smoothie recipe. Beat the coconut cream for one minute. Add maple syrup and vanilla and mix for an additional minute, until smooth and creamy. This can be made up to 3 days in advance.
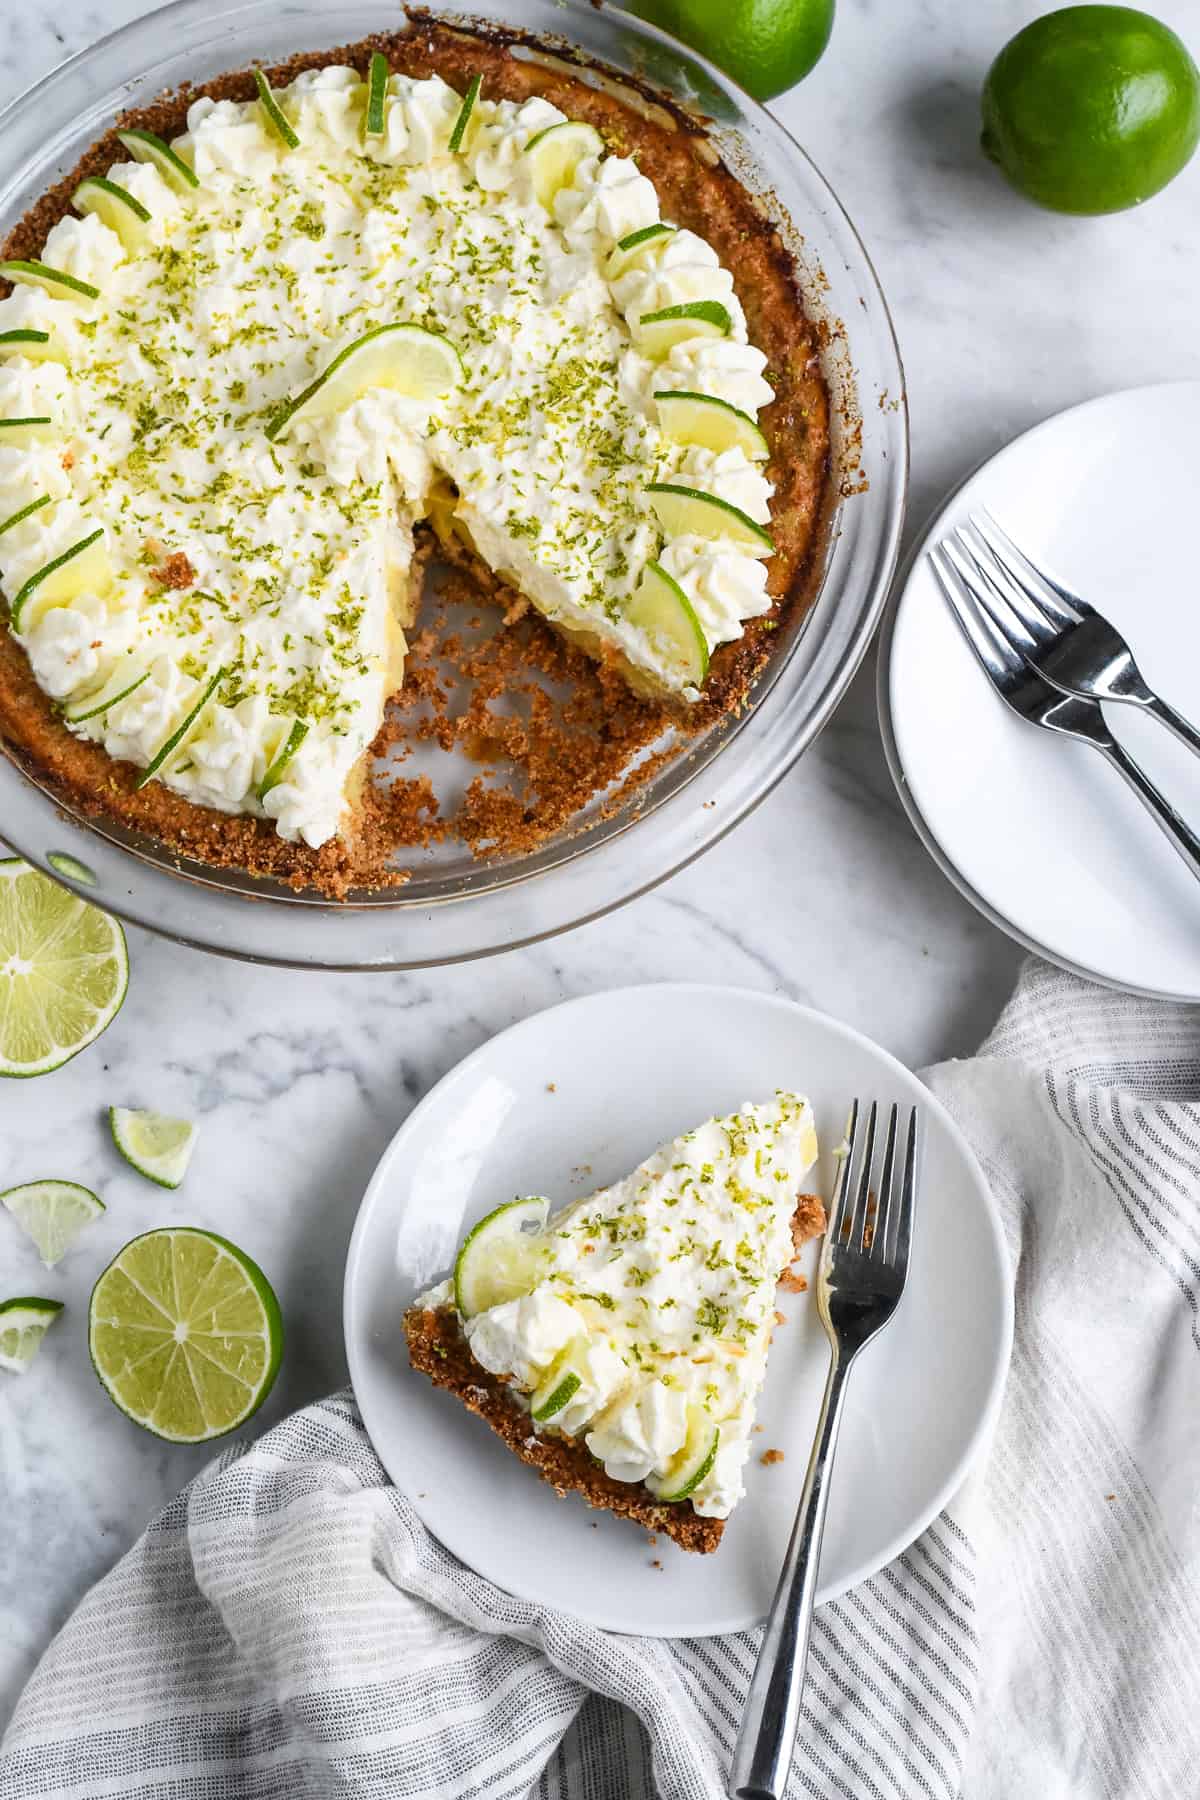
Top with the Whipped Cream – Spread the chilled pie with the whipped cream or just a few decorative swirls. Garnish with extra lime zest if desired. If you want to make it decorative, fill a decorating bag with the whipped cream and then squeeze the whipped cream out of the bag into swirls as in the photo. Cut into pieces and enjoy!

Ingrid’s Tips for Making Gluten Free Key Lime Pie
- This is important, brush your pie plate with an oil that is liquid at room temperature. I use avocado oil. Don’t use coconut oil. This will prevent your crust from sticking to the pan.
- Put your pie crust onto a baking tray before adding the filling. The baking tray makes it easier to take it in and out of the oven and prevents the mitts from mashing the edges of the pie.
- Have your limes at room temperature, it significantly increases the juice yield. Roll the limes on the countertop to break up/loosen the membranes so it’s easier to juice.
- Use a hand citrus juicer for juicing and a microplane for zesting. (see photo above).
- Zest your limes before juicing.
- Mix the flours for the crust until there are no lumps before adding the oil.
- For the coconut whipped cream, chill your mixing bowl and beaters in the freezer for 15 minutes.
- Chill your pie for at least 3 hours before spreading the whipped cream.
Storage
- Storing: Refrigerate the Key lime pie covered with the aluminum you used when baking for for 2 to 3 days.
- Freezing: If you want to freeze the pie, leave off the whipped cream and tightly wrap in plastic for up to 3 months. Let it thaw in the refrigerator for 3 hours then add the whipped cream.
I hope you love this light, creamy, sweet tart, gorgeous dessert as much as we do. It’s a healthy, delicious elegant treat, everyone will love.

Additional Recipes
You may also enjoy these other light, fresh, gluten free desserts:
- Fresh Lemon Bars
- Vegan Lime Cheesecake
- Vegan Strawberry Tart
- Paleo Lemon Cream Pudding with Strawberry Sauce
⭐️ PLEASE GIVE THE RECIPE STARS!
Do you like this recipe? If so, let us know how it turned out by leaving a star rating and comment below The stars help me get noticed by google which allows my business to thrive. Leave a comment or question, I love connecting with you. Thanks, 💛 for supporting Eat Well Enjoy Life.
Subscribe to my weekly newsletter so that you never miss a post!!
PrintGluten Free Key Lime Pie (Dairy Free)

Here is a healthy key lime pie with an ultra creamy, tangy, sweet custard in a gluten free graham cracker crust topped with coconut whipped cream.
- Prep Time: 20 minutes
- Cook Time: 60 minutes
- Total Time: 1 hour 20 minutes
- Yield: 8 servings 1x
- Category: Dessert, Snack
- Method: Bake
- Cuisine: Paleo, Vegetarian, Gluten Free, Dairy Free
Ingredients
For The Gluten Free Graham Cracker Crust
- 5 Tablespoons palm shortening 60 grams, ghee, or coconut oil, melted
- 1 ¼ cups + 2 Tablespoons blanched almond flour, 154 grams
- ¼ cup coconut flour, 30 grams
- 2 Tablespoons tapioca flour, 14 grams
- ¼ cup coconut sugar, 45 grams
- ½ teaspoon cinnamon
- ¼ teaspoon sea salt
- 1 Tablespoon honey
- Oil for brushing the pie pan*
For The Filling
- 3 large pastured eggs +3 egg yolks
- 3/4 cup maple syrup
- 3/4 cup key lime or fresh lime juice
- 3 Tablespoons tapioca flour
- 1 cup organic coconut cream mixed before measuring (see notes in ingredients above)*
- 2 Tablespoons finely grated lime zest + 1 tablespoon for garnish
For the Coconut Whipped Cream
- 13.5 oz coconut cream or 2 cans full fat coconut milk, chilled for 1–2 days
- 1 Tablespoon maple syrup, honey or sweetener of choice
- 1 teaspoon vanilla extract
Instructions
For The Gluten Free Graham Cracker Crust
- Gently melt palm oil in a small pan. Set aside and let cool.
- Preheat the oven to 350°F.
- Brush or spray a 9-inch deep dish pie plate lightly with liquid oil.
- Add the almond flour, coconut flour, tapioca flour, coconut sugar, cinnamon, salt and honey to a medium bowl and mix until combined and there are no lumps.
- Pour in the palm shortening and mix until well combined.
- Using your fingers and the bottom of a measuring cup, press the crust mixture evenly into the prepared pie plate. Start by working the crumbs up the sides, then press the remaining crumbs into the bottom of the pan. Don’t pack it down too hard to ensure the crust releases from the pan.
- Bake for 10 minutes. Transfer the pie plate to a wire rack to cool completely before adding filling.
For The Filling
- Preheat your oven to 350 degrees.
- Make the lime zest. Save some for the garnish. (use a microplane, see photo above)
- Squeeze the lime juice. (use a hand juicer, see photo above)
- Mix the lime juice with the tapioca to dissolve.
- In a large bowl using a hand mixer beat together the eggs and yolks. Slowly pour in the maple syrup in a stream. Beat until combined, about 1 minute.
- Add the coconut cream, lime juice/tapioca and zest, mix well until very smooth.
- Pour the filling into the crust and bake in the preheated oven for 15 minutes. (see tip above)
- After 15 minutes, cover the top of the pie loosely with aluminum foil to prevent the crust from browning too much. Continue to bake another 30-40 minutes until just set (the center will still jiggle a bit) for a total of 45-55 minutes.
- Remove from oven and cool completely at room temp, then refrigerate for at least 3 hours before topping with coconut whipped cream.
For the Coconut Whipped Cream
- Place your can of coconut cream or coconut milk in the refrigerator for 1-2 days.
- Chill your mixing bowl for 15 minutes in the fridge.
- Open your can of coconut milk and scoop out the hardened coconut cream. Pour the coconut water into a separate storage container and use that in a future smoothie recipe.
- Using a hand mixer, beat the coconut cream for one minute. Add your sweetener and vanilla and mix for an additional minute, until smooth and creamy.
- Spread the chilled pie with the whipped cream or just a few decorative swirls. Garnish with extra lime zest if desired. If you want to make it decorative fill a decorating bag with the whipped cream and then squeeze the whipped cream out of the bag into swirls.

Notes
Use an oil that is liquid at room temperature, like avocado oil
If the coconut cream is separated, put it into a pot of hot water to soften and then shake it up.
I made this with my kids. I was a little nervous because I have never made key lime pie before and there were a lot of steps to follow. But this came out perfectly. In spite of being dairy and gluten free AND that I cheated a bit and didn’t chill the coconut cream for two days but instead put it in the freezer for an hour. I thought for sure I messed it up. But it came out amazing!! And I don’t feel bad letting my kids eat it. Can’t wait to make it again!
WOW Lisa, you are so cool for making this even though you were a little nervous. Even the coconut whipped cream came out from the freezer, fantastic. I’m so glad you and your family like it. It’s one of my most favorite desserts, my family loves it too!